This is the second article of our new series, about making awesome video editing tasks in Windows 10 on your own, using only free tools .
Here you will find a simple guide on how to convert your videos or videos you have download in your PC with the use of free software, despite the file format. The whole process is done in your PC, without the need of uploading your private or home videos in an external server for processing.
Apart from the privacy, the whole process in done very quickly, as the software we advice is fast, simple and powerful.
So, let's start over!
Video Conversion... What is this?
As stated in Wikipedia here, Video Conversion (or Transcoding) is: "...Transcoding is the direct digital-to-digital conversion of one encoding to another, such as for movie data files (e.g., PAL, SECAM, NTSC), audio files (e.g., MP3, WAV), or character encoding (e.g., UTF-8, ISO/IEC 8859). This is usually done in cases where a target device (or workflow) does not support the format or has limited storage capacity that mandates a reduced file size, or to convert incompatible or obsolete data to a better-supported or modern format....".
To clear up the things, when we talk about video conversion, we mean to convert a video from a special video format to a well known file format (e.g. from .OGG or .WEBM to a MP4 video).
To clear up the things, when we talk about video conversion, we mean to convert a video from a special video format to a well known file format (e.g. from .OGG or .WEBM to a MP4 video).
Keep in mind that a video is just an arrangement of many photos (frames from no on), in a sequence.
Frame 1, frame 2, ... etc.. When you see them in a presentation order, one-by-one, then it is a video.
In order for a human eye to understand a movement on a video, the frames must be at least 25-30 or more, during in a second. This is what is called as Frame Per Second (FPS) of a video. The more is the FPS, the better is the visual feeling for the viewer.
A video always has an encoding for keeping the file size small. Generally, the encoder of a video produces a different file extension name, although this is not true. For example, a video with the general AVI file format may have been encoding with one of many encoders (e.g. H264). The file extension is called the Container.
There are plenty codecs and encoding so, around the Web you will find a variety of different video file formats. Thus, there is the need to convert any video file format to a general encoder, in order to be sure that the new video will be playable into almost any device.
Video Conversion Software (?)
For every video conversion task, a special software is needed. If you search a little on the Web, you will soon find out that there are plenty of video conversion software tools and applications. Some of them are online, where you have to upload your video, the conversion will be held on the web server, and after a while you may download the new video with the new file format.
Here we will use a special video conversion software, inside a Windows application, that is powerful and very easy to use. We talk about the "Videos Convert+" application, created from the Mobility in Life Application TEAM. The creators of the app, focused on making video conversion very simple, using 2 steps, one-by-one. An advantage of the "Videos Convert+" over other free video conversion apps, is that it can handle and edit ANY video file format.
Thus, you will not have to worry if your video you are going to convertis in .webm or .ogg format. With Video Convert+ this is not a problem!
Convert an existing video
First of all, you have to install the application to your device, if you haven't done this already.
Just tap on the next link to download the official latest FREE version from the Windows Store.
Just tap on the next link to download the official latest FREE version from the Windows Store.
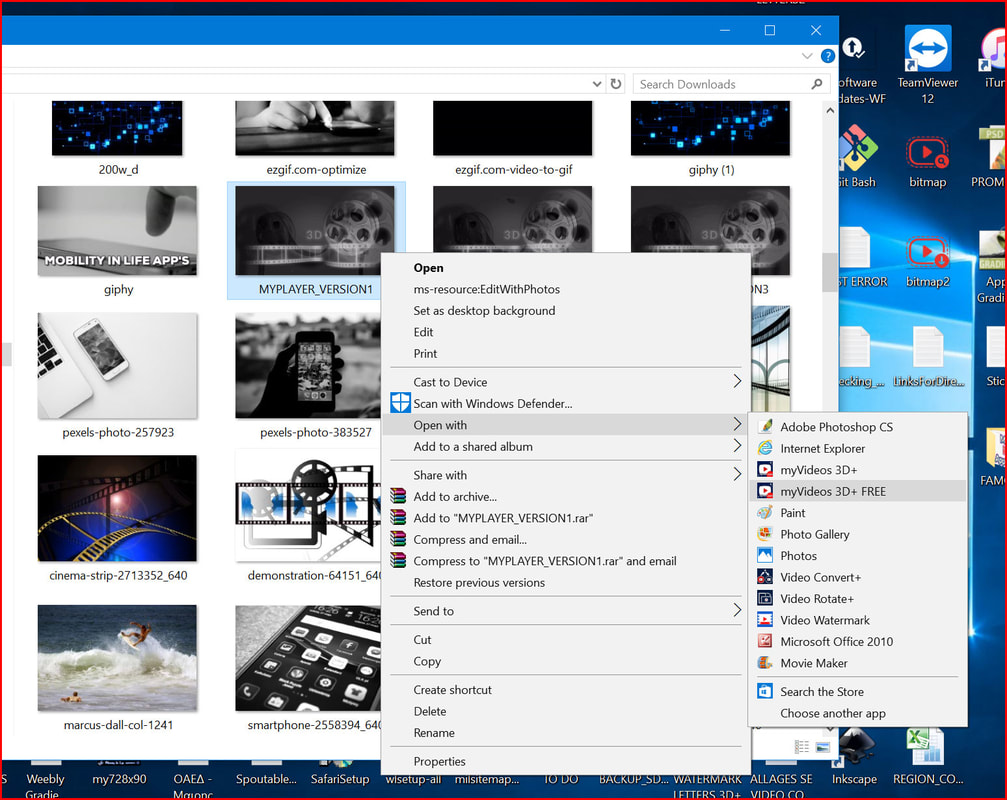
After the installation, you can simply open the app and select a video to convert, or, inside the Windows folder, right-click the video you want to edit and select the option: "Open With..". Find the "Video Convert+" app on the list and click on it.
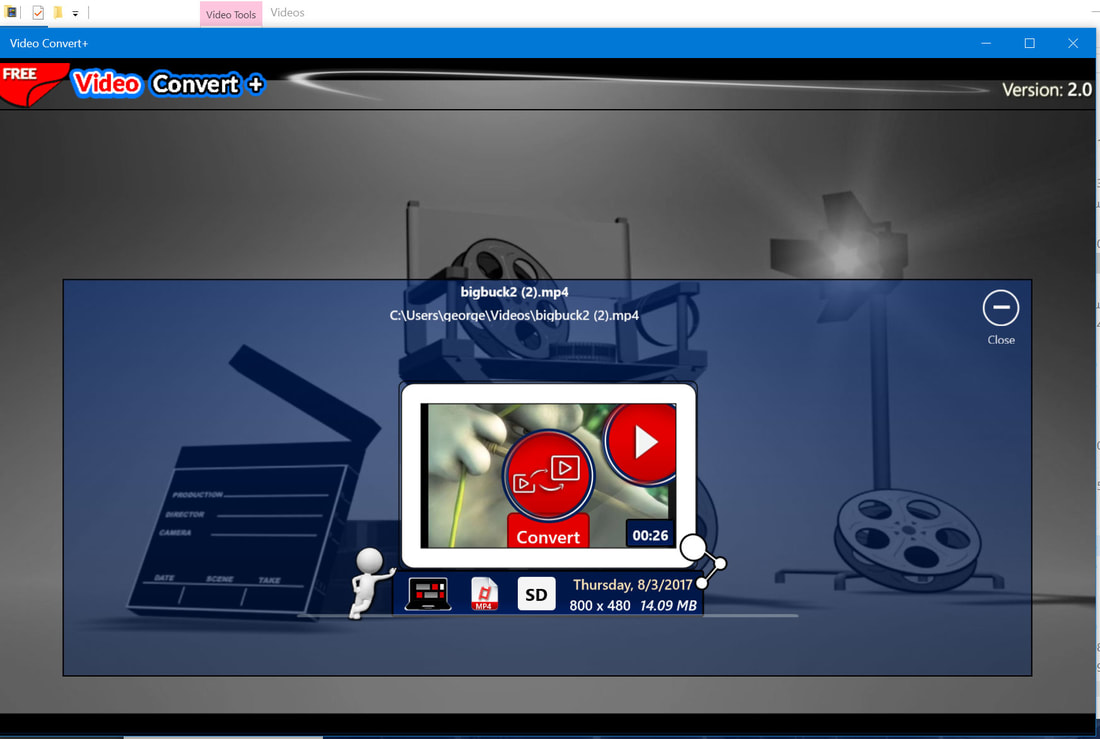
The app will launch and a preview of your video will appear. Select "Convert".
 The app is open with a video preview. Tap on the red button: "Convert" on the center to start conversion...
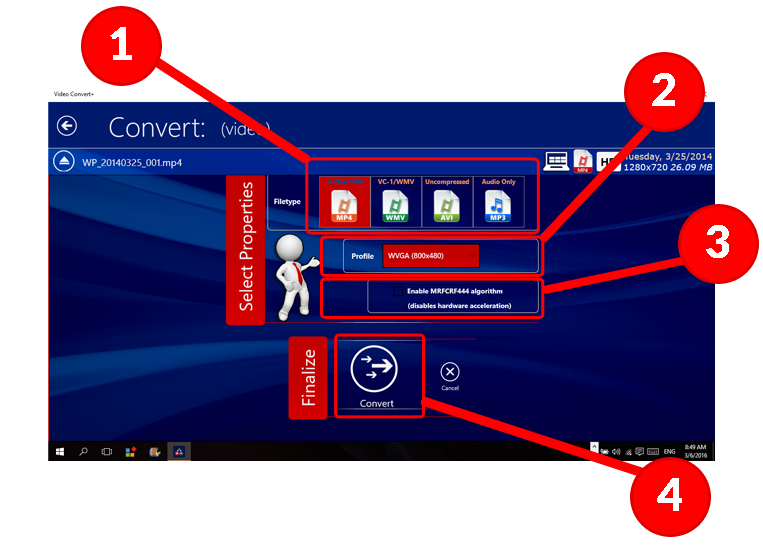
Now, a new form with all the avaliable options for video conversion is shown. Just follow the steps and a edited new video will be created. PS: The initial video will remain intact.
Check what you want from the 3 options and tap on the button "Convert (4)". Then relax, and after a while the new video will be autogenerated with the specific file format you have chosen on Step 1.
Available Options & Settings for the New Video:
1. The filetype (this also affects the codec of the new video).
2. The Video Profile Setting (the video Resolution you want for the new video).
3. A setting for disable or enable Hardware acceleration during the conversion process.
If you don't want to change an option during the selection, then just ignore it.


